Monday, April 15, 2019

Sewing Tutorial: Art, Craft, or Makeup Supply Pouch

My four-year-old’s preschool teacher asked me to come talk to the class about sewing. I told them (briefly) about finding patterns, picking fabric, cutting pieces (with warnings about asking an adult first and to only use them cutting tools for fabric), sewing them together…and ripping seams. I’ve been wanting to use up my leftover pieces, so I made each kid a little marker/pencil/paintbrush/etc holder. I had a lot of markers that one of my mom's friends gave me, enough to put two in each of the eighteen holders. 


SUPPLIES

Less than a fat quarter’s worth of fabric scraps
Batting
Ribbon

DIRECTIONS

Once the fabric is prewashed and ironed, cut four 7x9inche pieces. Cut a 7x9 inch piece of batting, and two 20 inch long pieces of ribbon. Decide which pieces of fabric are for which part. You’ll need an outer fabric, an inner fabric, a flap, and a pocket. The inner fabric will show the least.

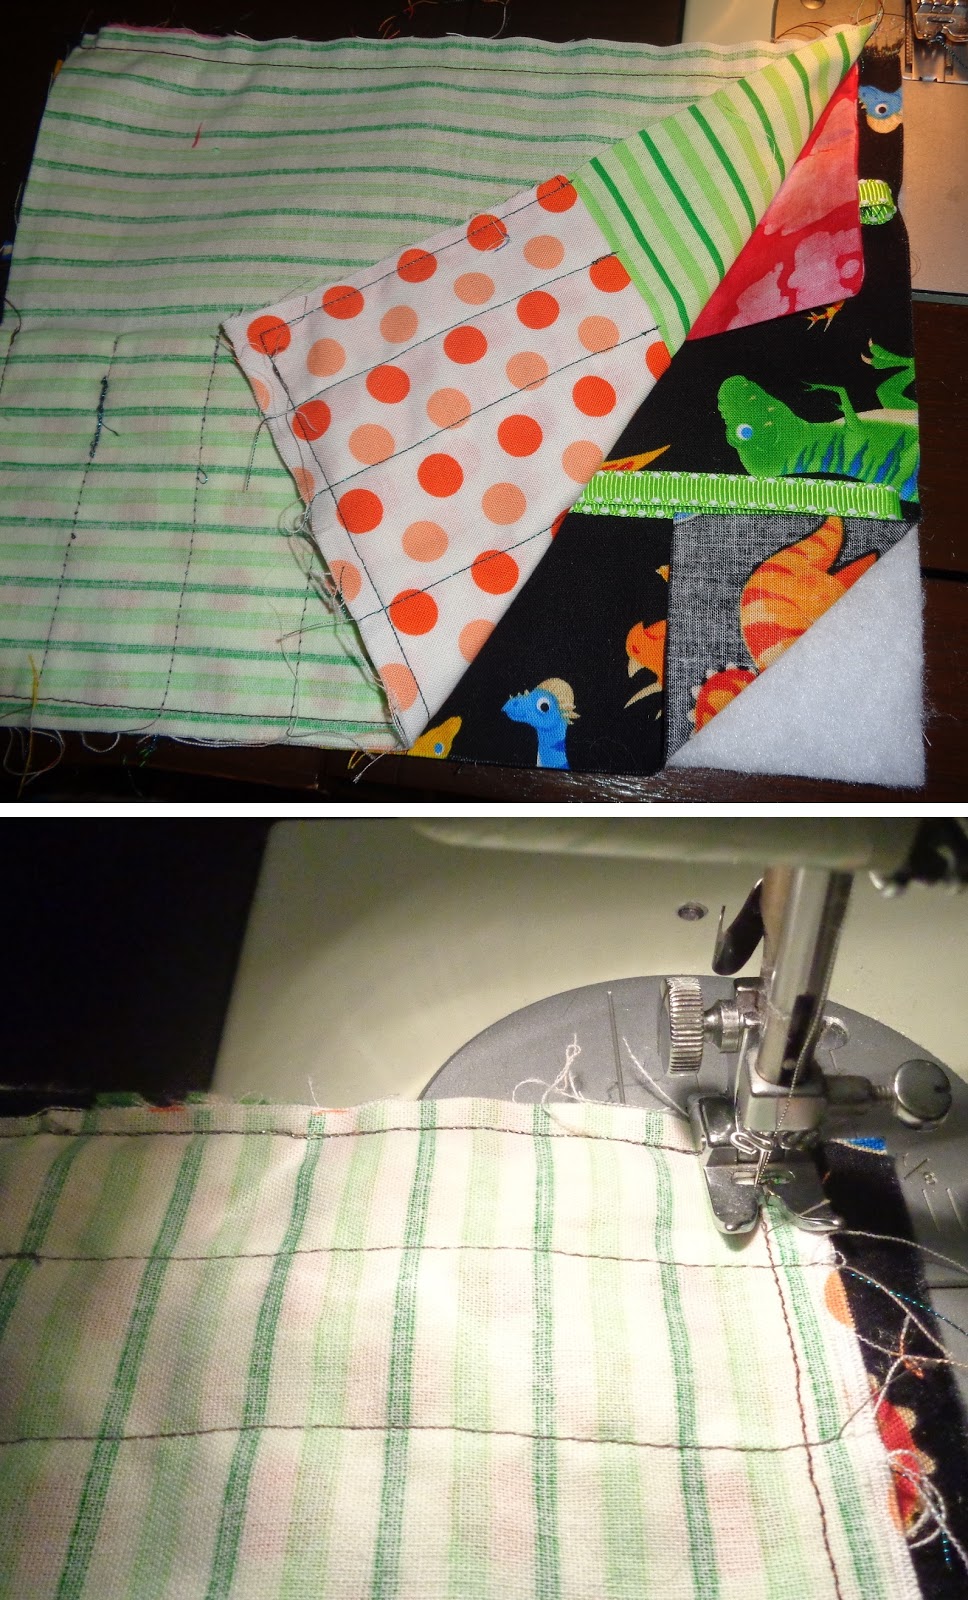
Here, my outer fabric is dinosaurs,, my inner fabric is green stripes, my flap is red, and my pocket is orange polka dots
Fold the flap fabric right sides together lengthwise (making a 4.5x9 inch piece). Sew the short (4.5 inch) edges closed, using a large seam allowance—I used half an inch. Turn right side out and press to make a crease along the folded edge. Fold the pocket piece wrong sides together in half lengthwise and iron to crease the folded edge.


Layer the pieces as follows: inner fabric right side up, flap on top, pocket on bottom. Sew the fllap in place along the top and all along the raw (non-folded) edges of the pocket, using a narrow seam—about a quarter inch.

Mark the middle of the pocket lengthwise, and mark about every inch and a quarter from the middle to both edges. Using your ruler and disappearing ink, draw lines to guide the sewing of the eight pocket compartments. Sew along guide lines.


Sew the ribbon on the outer fabric, about two inches from the top and two inches from the bottom. Only sew about four inches of the ribbon, starting half an inch from on edge.

Sandwich the pieces together as follows: batting, outer fabric right side up (be careful to tuck the ribbon in), inner fabric (with flap and pocket pieces sewn on) right side down. Sewn all along the perimeter, using the stitches you’ve already sewn as a guide. Leave an opening for turning.

Turn, iron, and top-stitch. This step and the step for putting on the ribbon are good for decorative stitches. Since I was making 18 of these, I just used a simple zig-zag.

Monday, April 1, 2019

Sewing Tutorial: Charming Soft Baby Cube Toy

I first made one of these as a baptism present for my cousin’s baby girl. The six symbols are an Ichthus (Jesus fish), Alpha and Omega, INRI (Iesus Nazarenus Rex Iudoreum, Latin for Jesus of Nazareth, King of the Jews), an IHS symbol (Latin for In Hic Signa, which means in this sign, from the story of Constantine’s conversion to Christianity), a Chi-Ro (one way to abbreviate Christ, again from Latin), and a cross. I later also made a set of simpler ones with geometric shapes: circle, square, triangle, octagon, star, and heart. Both sets of shapes are in the PDF at the bottom of the page, which you can download to act as a guide for cutting the shapes.
She's one of my godchildren
SUPPLIES

Six charm squares or one quarter yard of background fabric
Six charm squares or one quarter yard of fabric for the shapes/symbols
Poly-fil or other stuffing
Optional: 6-12 jingle bells

DIRECTIONS

Prewash and iron your quarter yard of background fabric. Cut six 5x5 inch squares, one for each of the cube’s faces, or iron your six background charm squares. If you’re using a single cut of fabric and want all the faces the same size, you can also cut a cross shape told fold into a cube.
 I still sewed along the edges of this one to help it keep its shape.
Prewash and iron your second fabric, or iron your second six charm squares. Cut your desired shapes and appliqué them onto the six faces of the cube. 
Assembly line!
Using a quarter-inch seam allowance, sew the faces to each other right sides together along their edges. Leave an inch or two open for turning and stuffing. Be sure they’re facing the ways you want them to, and that they’re in the order you want. The arrangement is completely up to you, just be sure you do it the way you mean to. 
 For the religious symbols, I like the Ichthus and the Alpha and Omega on opposite sides, the INRI and IHS on opposite sides, and the Chi-Ro and cross on opposite sides. For the shapes, I pair them circle and octagon, square and triangle, and heart and star. 
Once they’re sewn and turned, stuff them firmly with Poly-fil or something similar. If desired, put a jingle bell or two in the middle so the cube will make a noise when shaken. Hand stitch up the last little bit, and you’re done!
A bit of thread to close that gap, and they’re ready to be played with. 
Here is the PDF of the symbols and shapes: Shapes and Symbols